(As questions/answers/tips concerning my Push-Pull Colpitts come up I'll post my thoughts here.)
How do you get this transmitter on frequency? Typically I'm tuning my transmitter to a frequency I'm listening to on the station receiver. If so, I simply tune the transmitter until it is heard in the receiver. Now, a couple of things to keep in mind. First, the load on this sort of directly coupled oscillator transmitter will effect the frequency. You will have to have the transmitter connected to your antenna when setting the frequency. Try to keep this short as everyone can hear you swishing the band. Second, be careful that you are listening to your actual signal and not an image. A superhet receiver will receive two signals at the same dial setting. The second, unwanted and weaker signal, is called the image. Filtering within the receiver rejects this image signal but filtering can only do so much. The strong local signal from your transmitter may get through the receiver filtering as a weak station. If you use that as your transmit frequency, you will be far off your intended frequency and, possibly, out of band.
Where's the key? Many early transmitter construction articles left the keying method up to the builder. Everyone had their favorite. In this case I used cathode keying by placing the key between the filament center tap and ground. Lacking a filament transformer with a center tap I could have simulated the center tap by using two 40-75 ohm resistors. Keep in mind that cathode keying results in some amount of voltage on the ungrounded key terminal. See my blog entry at https://w0vlz.blogspot.com/2018/04/cathode-keying-safety.html for how to deal with this. Also, be sure to provide a separate path for B- to ground. Otherwise you will be doing B- keying and have the entire power supply voltage across your key terminals.
Why are your coils different from what the article says? Studying the original January 1934 QST article I decided that the 80 mtr coils were just too tightly wound for my comfort. The author allowed only 1/16" between each turn. Shorts were bound to happen. I added 1/2" to each tank coil, spacing the tank coil supports 3" apart rather than 2 1/2" apart. I had enough spare capacity in my tank capacitor to compensate for the decreased inductance. For the same reason I allowed 2 1/4" between the inner to tank coil supports rather than the specified 2". My antenna link coil has only 5 turns rather than 7 like the article recommended. I found that 5 turns gave me more output at 12-15 watts input.
What are the coil sizes and turn counts?
Here's what I came up with for coils for 80, 40 and 20:
| Band |
Coil |
Material |
Diameter |
# Turns |
| 80 |
Tank |
3/16" Cu |
2 1/2" |
10 |
| 80 |
Ant Link |
3/16" Cu |
2 1/2" |
5 |
| 40 |
Tank |
1/4" Cu |
2 1/2" |
5 |
| 40 |
Ant Link |
1/4" Cu |
2 1/2" |
3 |
| 20 |
Tank |
3/16" Cu |
1 1/2" |
4 |
| 20 |
Ant Link |
3/16" Cu |
1 1/2" |
2 |
Keep in mind
that there are two tank coils per band with the antenna link coil
swinging in a 2 1/4" gap between them. Each tank coil is 3" long and
each antenna link coil is 1 1/2" long. Wind all of the coils in the same
direction. I found 3/16" copper tubing on Amazon.
What sort of tank tuning cap is that? This Push-Pull Colpitts calls for 250pf across the tank coil with the capacitor rotor grounded and the tank coil connected to the two stators. This requires each section to be 500pf. What I found is a dual 550pf per section Cardwell capacitor. It is physically laid out with the two sections, both rotor and stator, turned opposite each other. It looks like a differential capacitor but it is really just an mechanically unusual two gang variable capacitor. This design helps balance the two section rotor. Any 500-700pf per section two gang variable capacitor would work here.
While we are on the topic of the tank tuning capacitor...notice that many variable capacitors have stator connections on both sides. This allows a convenient path for routing from the plate of one tube through a feedback capacitor to the grid of the other.
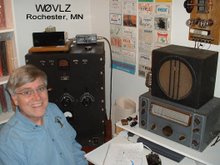
What is the order of the connections along the back? See the photo below. Facing the transmitter from the outside/back, left to right: B+, B-/Gnd, Key+, Key-/Gnd, Fil CT, Fil, Fil.
Will this design work with other tubes like 45s or 27s? I've never tried a 27 or 45 in this circuit but others have run Push-Pull Hartley and TNT transmitters with 27s and 45s so they will probably work here. R, the bias resistor, will need to change if a different tube type is used with different characteristics. The Push-Pull TNT article in the November 1930 QST recommends a 10K bias resistor for type 10s and a 50K bias resistor for type 45s. 50K is a good starting point if planning to use 45s.
What's that insulator in the center of the tank coils? This insulator is there as a safety precaution. B+ is on the copper strip just below the antenna swinging link. I worried that the antenna link, if not tightly secured, might sag down and short B+ to my antenna system. This insulator limits the movement of the antenna link.
If I'm using 2.5V tubes like 45s or 27s do I need a 2.5 VAC filament transformer? The 27 has an indirectly heated cathode. The two 27 filaments can be connected in series and lit from the 5V winding common on many tube era transformers. 45 tube filaments, while 2.5VAV, are directly heated. I don't know if they can be operated the same way. Try it and let me know.
What sort of B+ supply do I use? I use a regulated 200-325VDC supply. 10s can handle higher B+ but why stress them and risk an expensive tube failure? 15 watts input is fine with me. The regulated supply also results in a more stable signal.
The bare wiring underneath looks like it might short together. Shouldn't that all be insulated? There is more room underneath the "deck" then you might guess looking at the photos. That space is 1.5" high by almost 12" x 12". There is plenty of room for three layers of wiring given stiff wire. In a few places where I needed extra stability I used brass screws as standoffs/supports.
This looks pretty dangerous. Shouldn't you have a cover so you don't get electrocuted? There are lots of places where B+ is exposed on this transmitter. This is not unusual for these early designs. Always shut down the power, checking it twice before doing anything behind the non-existent front panel or underneath the chassis. I also recommend leaving a metal screw driver (with insulated handle) levered between the B+ and B- power terminals while changing coils.


 As a final check I recommend taking advantage of one of the many web based radios available all over the world. Link into one of these, turn on your own computer speaker, set the frequency/mode you wish to test and then transmit. Given needed propagation you can listen to yourself and the waterfall display helps you see what your signal is actually doing.